Directive Blogs
How to recover your laptop from a nasty spill!
Since the invention of laptops, “the workplace” has become a phrase that may describe many more places than the office your business is established in, as mobile computers encourage taking your productivity with you by their very nature. However, this “productivity anywhere” feature does not come without its dangers to the poor laptop.
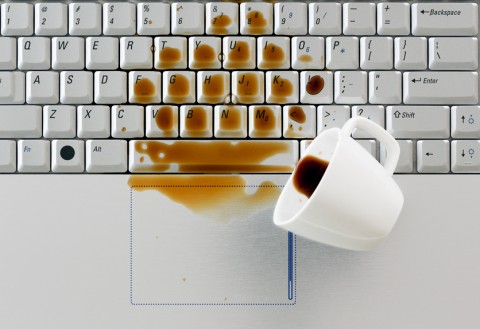
Picture, if you will, a restaurant in which you have stopped to get some lunch. While sipping your complimentary glass of water after you have placed your lunch order, you decide to get some work done while you wait for your rueben and homemade chips to arrive. So you pull out your laptop and begin typing away. Before long, however, disaster strikes as you reach for your beverage and fumble it, splashing some water onto your keyboard.
Clearly, this is not something that should happen to a laptop, and could potentially cause some serious damage to the device. However, if approached correctly, the laptop can be salvaged.
Procedure:
First thing comes first: Do. Not. Panic. You need to keep your cool in this situation, and not start pressing buttons mindlessly or do any other potentially harmful actions to the laptop.
For the next step, power down the device. Water and electricity are a famously bad combination, so keeping the power running is the last thing you want to do. Depending on the circumstances, there are different steps to shutting down. If using the battery, turn off the laptop as you normally would - either through the shutdown procedures or by implementing a force shutdown by holding the power button. However, if you are using the AC adapter to power the device, don’t touch anything until you are positive that both the adapter and wiring are bone-dry. If there’s even a hint of moisture on these components, don’t touch them, kill the power at the circuit breaker.
Once the device is off, remove the battery, you don’t want to have a source of power anywhere near moisture, remember.
Once the laptop is completely devoid of power, it’s time to perform some surgery to assess the damage. You will need to remove the keycaps to evaluate the damage done to the interior of the device. This is a process in itself.
As a reminder: this is the keycap removal process for a keyboard on a laptop device. The keyboard of a desktop device will require a different process entirely.
To remove the keycaps from a laptop, select a small wedge-shaped tool - a flat-head screwdriver or even a fingernail would work - and pry up each keycap until you can remove it fully with your fingers, if necessary.
This will expose the key retainer, which may be removed in a similar way.
With the key caps removed, you will hopefully see a plastic or rubber membrane covering the inner workings of your laptop, which simplifies your task into simply mopping up the moisture that has seeped down through the keys. If there is no membrane, the extent of damage to the laptop will depend on what the liquid spilled was. If nothing shorted out, a water spill could potentially leave no damage if given ample time to fully dry. Other beverages will leave a corrosive residue when they dry that might require a professional cleaning. IMPORTANT BONUS TIP: Never use a heated source to dry any interior moisture since it can damage sensitive components, a gentle flow of air from a regular, run-of-the-mill fan is a safer option.
To replace the keycaps once the interior has been dried out, orient the the key retainer clip to the metal hooks and replace it, finishing by pressing the key cap back into place.
With any luck, your laptop’s keyboard will retain function after this simple cleanup job. For more tips like these, subscribe to Directive’s blog.
About the author
![]()

Comments